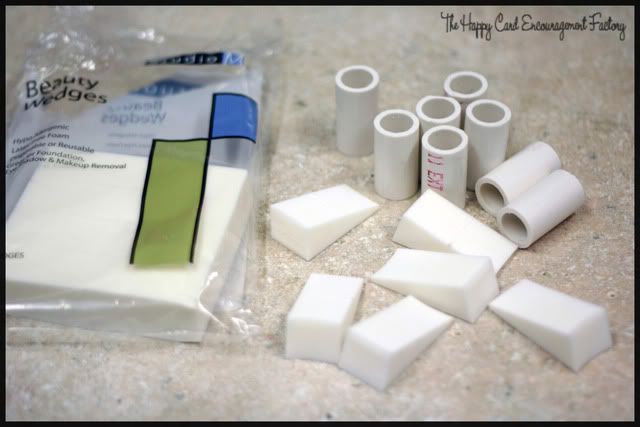
Here’s just two simple things you are going to need: 1/2″ PVC pipe cut at 1 1/2″ pieces and a pack of sponge beauty wedges.
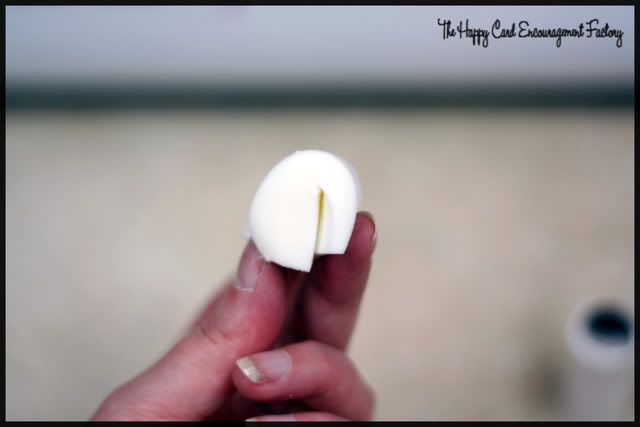
Take a sponge and fold in half.
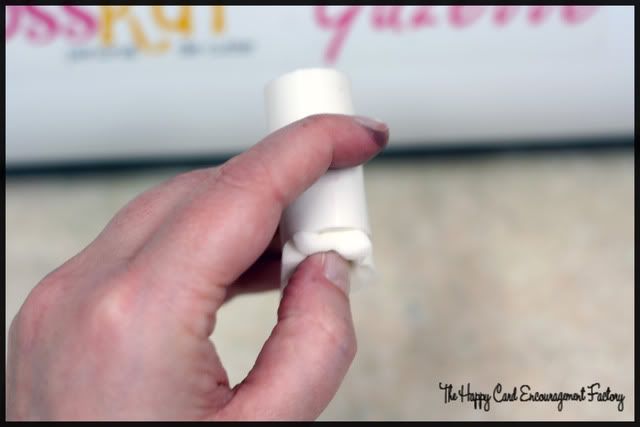
Take said sponge and smoosh it up into one end of the pipe….
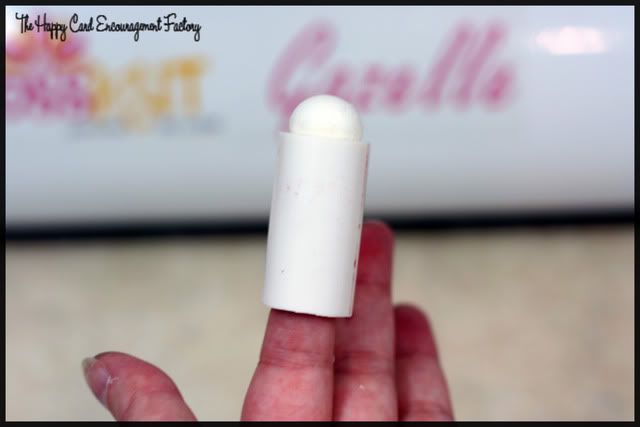
…till it comes out the other end and looks like this. Don’t push too far as the square edges will show.
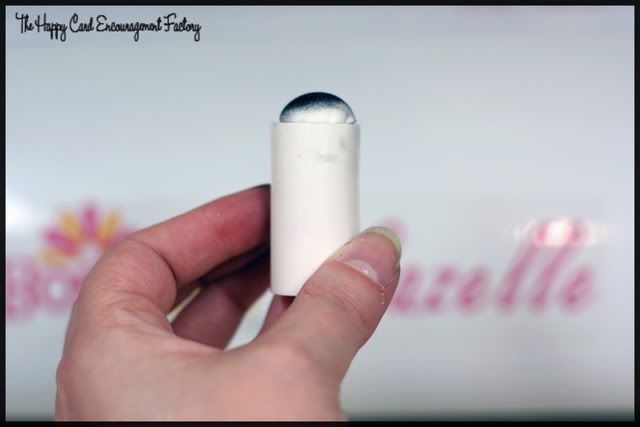
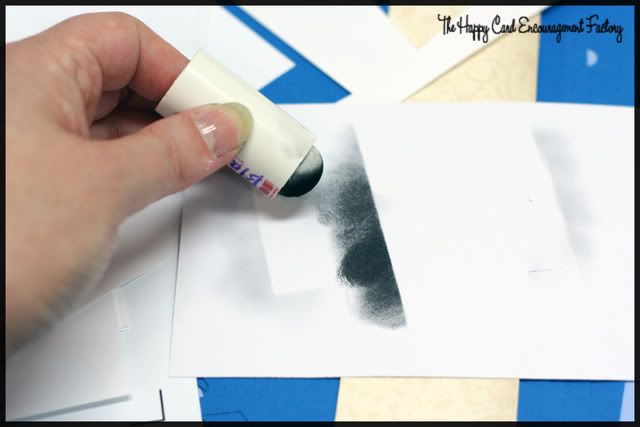
Proceed to ink the little sucker up with your favorite ink. Proceed to beautify everything in sight then congratulate yourself on a job well done. The roundness creates a nice soft edge. When I used to use the sponge without the holder, I always got hard lines. Drove me crazy!
Word of caution, keep your finger in the hole. I have a mighty daub so I have a tendency to push the sponge back in the tube. If you are a kinder, gentler inker, you may not have this problem. Another good thing, when your sponge gets yucky, pop it out and replace with fresh sponge. More cost savings and they are so cheap, you can have one dedicated to every color!


Love it!!! Great idea. Linda Harris
I am loving your tutorial.. You did a great job explaining and loved your insight.. Yes, .10 is absolutely sexy and much better.. LOL I’ve used those make up sponges (bought at my local 99c store) with office clips and still would sometimes get those frustrating lines.. Love your idea. I think my boyfriend and I need to head to Home Depot later.. May I ask what kind of tool your husband needed? We don’t have many tools so I can ask my neighbor.. please if possible email me @ vidabuena2001@yahoo.com
Again, Love the fabulous idea.. and THANK YOU SO MUCH for sharing with all of us..
OMG! I don’t know what I like better- the fact that you say smoosh like a technical term, or that you are so crackalackin’ crafty!
What a FAB idea Suuuuuwwwweeeeet girl!
What an awesome idea! CTMH sells these daubers as well ($3.95 a pack for 3) and I’d love to have one for every CTMH ink color (oh, just SIXTY!)…so we’re talking $79 for 60 daubers. Um, no thank you. I’ve been buying round sponges and cutting them into triangles (8 per) which is cost cutting, but the dauber just seems to have more control, IMHO.
Gonna have to go look for this–and imagine if you were to find black plastic pipe…I’m thinking the kind used for irrigation might work?
I think you’ve inspired me to start daubing
Thanks for this tutorial, gonna get hubby moving on this! Such a great idea!
Love the tutorial… I just recently got into using the Tim Holtz distress inks and this would be great!! Thanks for sharing.
(:(:Smiles:):)
Robin
the cricut scrapper
thank you so much for this tutorial.. I showed my boyfriend and he went to Home depot and bought a two foot pipe and cut me some daubers..he even found 1/2 x 3/4 little gadgets that give a bit of a handle.. he bought two for 58c… they are awesome… love these.. thanks
Oooooo thank you! I am all for finding inexpensive fixes for stuff like that Thank you for sharing!
Jennifer
http://www.firestormdesigns.com
You are all so very welcome! Thanks for stopping by and checking out my tut. Glad it made sense.
@Bee’s Hive – smoosh is a technical term, no?
@Robin – me too! I had been putting them off but bit the bullet with the Fall colors. I am sooo in love now.
@Jan – I know! Thank goodness there are ways for us frugal people to get the job done and save money doing it! I showed my hubby what you said about the black pipe and he said since it is more flexible those might work better. He said it depends on what feels better in your hands. I have some homemade alcohol inks in jars, maybe I will soak one and see if it comes out black. Worth a try!
I like your idea but Im going to try something different. Bottle caps.from 12 oz plastic soda and the felt furniture packs with the adhesive that they sell at the dollar store. I will stick the felt pad to the back of the cap and use it that way.
This is brilliant Becki! Thank you for sharing! Such a fabulous idea i’ve wanted those daubers but could not justify the cost. I already use the makeup sponges but they really need that dome shape I think to get a good distress.
Absolutely fabulous idea…love to save $$ on my obsession to craft.
Thank you so much for sharing. I love daubers but they are expensive and I must be heavy handed because I mangle them. Can’t wait to try.
Kathy T
Super idea! I have some daubers, and if you use them a lot they do wear out. Love the idea of refilling these! And the price is AWESOME!! You rock!
Swwweeeeeettt. ;-D
Take your permanent marker and write the name of the ink on the side of your white PVC pipe dauber, which makes it much easier to identify between shades. Anne Cain
Love this!!!
Thanks ladies! Anne, that’s what I have been doing. Just writing it on there till I remember to take my labeler downstairs. ^__^
Just found this on Pinterest, cooooool idea. Now how to get DH to start cutting the pipe for me, hmmmmm.
Really like Anne Cain’s idea above too I have to say.
Thanks, Astrid. I agree with Anne!
Amazing idea Becki! Can you just clarify if you cut the pipe into 1″ or 1 1/2″ pieces?
Thank you
I/2 inch cuts
I just purchased daubers on line – $4.70 for three daubers! The
pipe’ is a scant one inch. Should not that size work just as well? Thanks so much, Gin
Wow, that’s pretty pricey! I would try the pipe on your finger and see how it feels. I would think it would work, but depending on your hand size might be a little difficult to work with. Let me know, Gin.
These are so clever and even better we own a plumbing company and have plenty of this pipe.
Oh wow, Ann. Then you should be set! Thanks for stopping by.
This is ingenious!
Thanks, Cin!
I am a cheapskate crafter and I have three finger daubers and definitely need more.
Thanks this is a brilliant tip.
You’re welcome, Yvonne. Happy to see you here at cheapstakes are us! LOL
wow, thanks for sharing and giving the directions to make them ourselves. You are so funny, kept me smiling thru reading it. Reminds me of myself, ha. Will surely be making some right away. I too an a frugal crafter and can’t see paying all that for just 3. Have a blessed day, THANKS!!
You go girl..I love your inovative idea for making your own daubers..Saving $$ is a good thing.. Thnx for saring.. Hugz, Dotie
Glad you liked my tut, ladies! Glad I made you smile and save money too. LOL They kind of go hand and hand.
Ingenious! Thanks for the wonderful idea!
You’re welcome, Noreen.
Thanks for stopping by Michele!
Brilliant idea!! Thanks for sharing! Pinning this to Pinterest.
You are a genious!!!! Thanks for sharing.
Excellent idea! TFS
You’re welcome, Vicki!
Love it!!!!!!!!! Can you guess my hubby is on his way to Lowe’s now?!!! LOL….
Awesome! Tell him to pick up Starbucks too. I mean you did save him money!
Great idea!
OK, brilliant idea and great tutorial.
I love this idea and I am featuring this on my Fab Five Frugal Friday post!
Love your blog.
Linda
Oh my word! Thank you, Linda for the sweet comment and the shout out!
Oh my how cool is this! Thanks so much for sharing.
What a fabulous idea!! The kind that makes me say “Why didn’t I think of that?”!!! lol I will be doing this for sure!
Thanks, C. Good and Brenda. Glad you enjoyed it.
You’re welcome, Susan!
Thanks so much for the fun and cost-saving idea!
I found this idea on Pinterest yesterday and today I have over 50 daubers. I stored them standing up in a Darice Floss container one container will store 78 standing up. I have held off on purchasing the Tim Holtz distress inks but since I’m saving so much money on daubers I have convinced myself I can now purchase them. I LOVE,LOVE,LOVE this idea…thanks for sharing!
LOL, Lizz! Isn’t it wonderful when we save money on one thing to be able to blow it on another crafty product?!? I love that! That’s how I get all the paper I have. hehehe
What a great idea. Thank you for sharing..
Brilliant….thanks so much for coming up with this idea and sharing with everyone.
My 3 sisters and I usually get together every month to do crafting and have trouble around Christmas time for craft gift-giving ideas. This is definitely on my list. How wonderful. Thank you for this money saving tip. Brilliant.
Merry and Gail, thank you very much and you’re welcome! Thanks for stopping by.
You actually helped me solve a problem I was having in making my own felt alcohol ink daubers. Thank you so much!
Great idea! If the printing on the PVC pipe bothers you, here’s a hint: It can usually be removed by wiping it with a cloth dampened with acetone. Don’t have a can of acetone handy? Use cheap nail polish – It’s something like 99% acetone!
Wow, what a great tip. Thank you!
I’m am sooo gonna make these! And how about using washi tape as a clever pipe cover???
That’s a great idea too! But I am kind of a craft hoarder and wouldn’t want to use my Washi tape. I was just going to put a label over the words with my Dymo but will probably use the acetone trick. Thanks. ^__^
great tutorial, and I was thinking, you could always modge podge scraps of pattern paper to the pvc pipe to make them pretty
Thanks for the tutorial; I didn’t have PVC pipe so I used chipboard n made my own instead then covered with fabric. Thanks for the genius idea.
Yay!! What a GREAT idea! I will be trying it tomorrow @kayvycraft I love the chipboard idea as well
Thanks for the tutorial. I found this a few months ago. My son made me so many of these for a Christmas gift. I wanted something homemade, so this was perfect.
Thank you. I was just asking my manly neighbor if he could help me make some. I will have to show him your site. I come up with all kinds of ideas and go to him. Someday he is going to stop answering his door. lol
This is amazing Becki! Great tutorial – humerous too I think it you want sexy daubers, with these you could sexify them as much as you want!! I’ve never bought daubers for the reason that they were expensive, but I can definitely see these in my future!
Love this idea.
I just love this idea. Cheaper is better I say
This is a brilliant idea, thanks for that…luv Ursula
Glad you are all enjoying my tutorial! It’s great to save money, isn’t it?
A decorated shoebox full of these would make a really neat gift for a crafty friend!
That is a great idea, Thalia!
I thought this was awesome. I even had enough to share with my scrapping buddies. Of course, I had the same “issue” with the printing, so my son had some duct tape from making the duct tape wallets, i sat there while watching some of the “men” shows with my hubby (since he was so nice to cut these up for me, and got slithers in his eyes (didnt start out with safety glasses) — and viola…. i had them in all sorts of fun colors….
Glad you made a bunch and shared with friends, but sad to hear your husband got hurt in the process.
Becky,
Thank you for sharing your dauber instructions. What a wonderfully ingenious idea. I’ve always wanted to buy a bunch for all my different ink colors but knew that would be too expensive. Now I know how to make my own, thanks to you. I really like the idea of being able to toss the used sponge and replacing with new when needed. And another wonderful use for PVC. You are kindly generous to share. Thank you so very much.
Sincerely, Carol
You’re very welcome, Carol. Glad I could be of some money-saving help!
Thank you so much for sharing. I have 5 friends who get together once a month and make cards. Each of us design a card and bring supplies to make 6 cards when we leave we have six different cards to take home, I will make some of these for them.
God Bless You!
You’re welcome, Vickie! Thank you for stopping by.
Hey awesome idea! I’d wrap the daubers with some washi tape. Thanks for sharing!
My hubby is in the process of cutting my pipe now, so I will be working on them while watching tv tonight…. Thank you so much for sharing
I made 58 of these dawbers at just the cost of 2 bags of makeup sponge wedges from Dollarama. My son donated a piece of pipe he had in his garage.
That’s awesome, Pamela!! Now go get your craft on.
These work great but how are you storing them. I love the storage boxes that you can buy, but these are too tall. If I was starting over I would cut them 1″.
Hi Sally, my hubby made me a desk out of counter top that has 4″ backsplash. I was just lining them up along the back. But when we moved to Texas, I have them all dumped in a little container all together.
This is such a great idea, thank you so much!
Great idea!
WOW!! smart tip. My husband loves it when I save him money…….so he thinks..I just spend what I saved him.. thank you for your great tip. Cathy
hahaahah Cathy! Yes, that is probably true for a lot of us.
Clever inventions and inventors are fun to come by. Thanks for sharing.
Can you ask your DH what he used to cut the pipes? Mine is not handy and I will have to diy myself.
Hi, Jackie. My husband said he used his miter saw to cut the pipe. Thanks for visiting!
Hi. I had some 3/4″ tube that came with wrapping paper rolled around it. It was thin enough to cut with scissors but too large for make-up sponges. So I cut a bath sponge up and shoved it in the tube. Worked like a dream
I think you would be great at writing a blog. I like your style. It made me giggle and the idea is fabulous too. I can’t be bothered to go and find a pipe but I will try this with something else thats tubey
I have seen these made with larger deeper water bottle lids. But I like this idea much better!! Thanks for sharing!!
You’re very welcome! Thanks for stopping by.
have just stumbled upon this what a brilliant idea. Like how your hubby has helped will have to banish mine out to the garage to do some for me. Thanks for sharing
Rebecca thanks so much for.sharing your thrifty craft tip. Very clever. If you want to dress it up you might be able to use the tube off of a dollar store yard light. I’m using the light for something else and was looking for a way to recycle the tube that comes off. I think it will work perfectly for this. Anyway, please keep sharing your ideas. You may spark other ideas that we can share back. Best, Dawan
Did you cut the pipe into 1″ or 1 1/2″ pieces?
Well, what can I say but, thankful, thankful, thankful. From a great full English crafter. Brilliant piece of kit.
Hi Jennifer, he cut them in 1 1/2″ pieces. Thanks for stopping by!
You’re very welcome!