HappyCardFactory Designs

Dream. Create. Inspire.

  • Shop
  • Facebook
  • Pinterest
  • Twitter
  • Instagram
  • Home
  • Our Store
  • Blog
  • Tutorials
  • 3D Projects
    • 3D Crafts
    • 3D Flowers
    • 3D Letters
  • Contact
  • About Me
    • About Me
    • Disclosure
    • Privacy Policy
  • Join Our Group
You are here: Home / home decor / Mod Podge Coasters

Mod Podge Coasters

June 24, 2011 by Rebecca Wagner 2 Comments

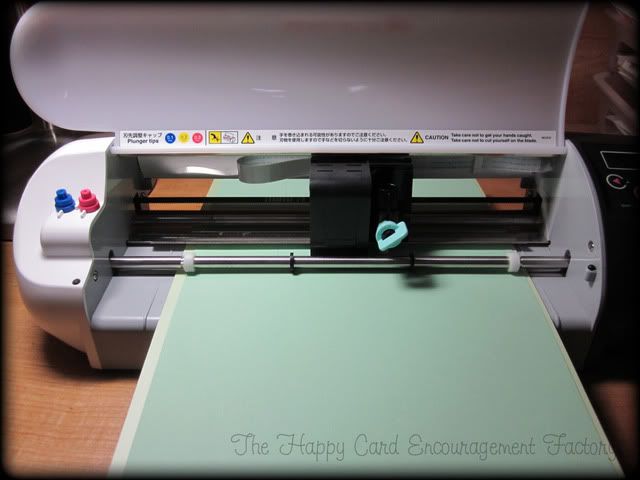
I love making home decor items.  I think more than cards sometimes. I know this is The Happy Card Encouragement Factory and I love to give people cards to be an encouragement.  But sometimes I think a cute little gift they can display in their home that is also useful is very encouraging too!  I had seen, on Mod Podge Rocks some time ago, a lady who made some coasters using Mod Podge.  I filed it away for a rainy day when I wanted to start the project.  I went and looked at the page I saved and come to find out that she was also behind the wonderful dollhouse template for the Paper Dolls’ first challenge.  It was Patricia from A Little Hut!  Go check her out, she is a wonderful designer!I thought I would add a few more pictures this time.  Sort of a step by step.  OK, I just wanted to show my beautiful “little brother” Silhouette SD in action, still action, but action none the less.  This is a nice little machine!  Cuts like butter, as you can see from the pictures.

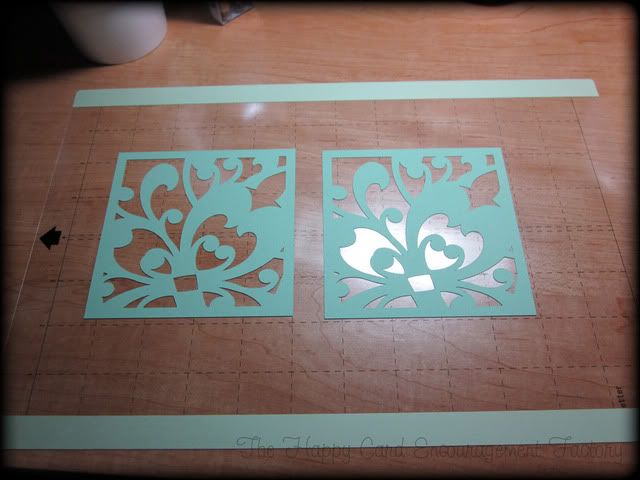
I used a file called Artistic Box Ornate from the Silhouette Studio store.  If you have a Silhouette and haven’t checked out the designer’s files on there you are missing out.  They have the cutest designs, I just can’t pick a few.  Silhouette America ran a Facebook special a few weeks ago for the store.  If you started a subscription it was 20% off the regular price.  The subscription is a really good deal, they put a lot of time and thought into making the store a great place with really nice designs.  I have a Boss Kut Gazelle too and the designs available from their store are nowhere near as nice as the ones at Silhouette America.

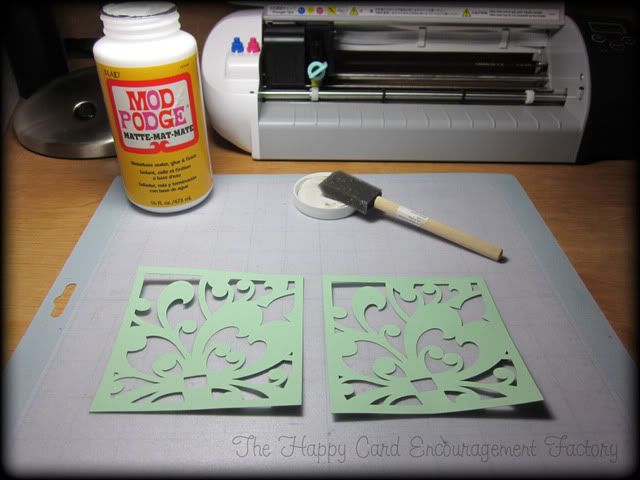
I bought my tiles from Home Depot for .16 a piece and were approximately 4.25 inch square in just plain white.  Opening the file in Silhouette Studio to the right size, I then placed my paper on the mat and started cutting.  I cut out only two at a time due to their size.  The first thing you want to do after taking the design off the mat is put a thin coat of Mod Podge on just the cutout.  This helps to stop the bleeding of the paper that occurs onto the tile.

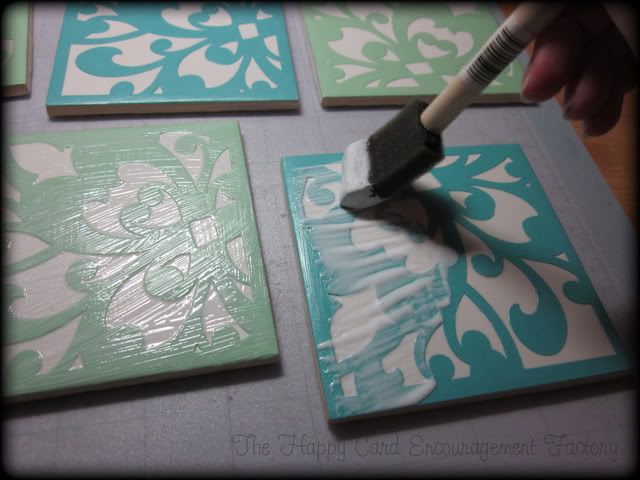
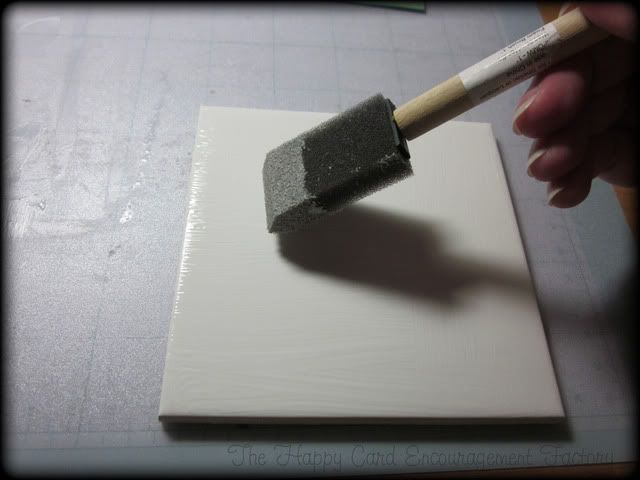
Then just place a thin layer on the tile itself, place and center your image and then another thin layer of Mod Podge.  I think it works better with three thin layers as opposed to one or two thick coats.  Also doesn’t take as long to dry.

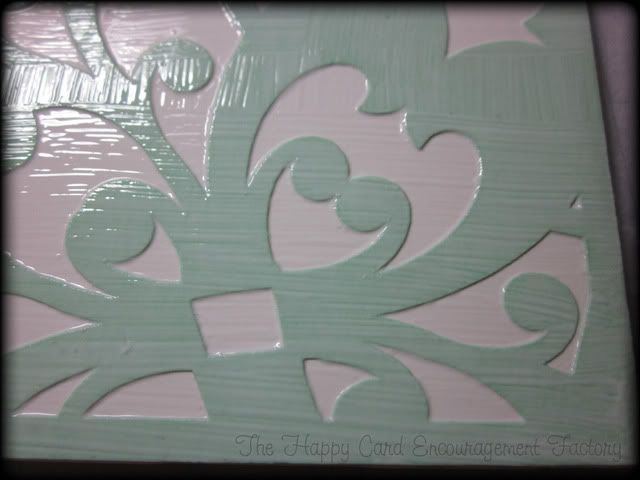
After everything was coated a few times and let to dry overnight, I sprayed a clear acrylic sealer in gloss on them.  I would have preferred the sealer in matte, but I had the gloss on hand.  If you choose not to seal, the Mod Podge when wet will cloud up and get a little soppy.  They will dry out again and go clear, but I wouldn’t want to take the chance and ruin them with repeated use.

Here they are all finished and looking good all tied up with twine from the Twinery.  I can see many birthday gifts in my future.  My mother-in-law loves this kind of stuff and doesn’t care what the pattern or colors are.  She just likes.

I had some after thoughts on this project – what about using green tile with the blue paper or vice-versa.  Maybe even black tile with white paper.  Maybe even a Print n Cut.  The possibilities are endless with this project.  Have any other ideas or comments?  You know where to put them.  I would like to hear what you guys or gals would do with this.  Thanks for looking!

Filed Under: crafts, home decor, Mod Podge, Silhouette, tutorial

« Bottle Cap Magnets
Paper Dolls Challenge Week 4 – Wearin’ my flippy – floppy’s! »

Comments

  1. Mod Podge Amy says

    July 6, 2011 at 2:47 am

    Ooooh!! I love those! What a great pattern (and good paper colors)!

    Reply
  2. Becki says

    July 6, 2011 at 12:25 pm

    Thanks Amy!

    Reply

Leave a Reply Cancel reply

Your email address will not be published. Required fields are marked *

This site uses Akismet to reduce spam. Learn how your comment data is processed.

About the Designer

Hi, I'm Rebecca. I am a child of God. A loving wife of 29 years. A boy mom. A collector of gadgets, gizmos, and superhero action figures. Making the world more organized one planner at a time. Read More…

  • Facebook
  • Instagram
  • Pinterest
  • Twitter

Looking for Something?

Categories

Copyright

You are welcome to feature or share any article, as long as you use only one image and link back to the specific post. You may NOT edit, crop, remove my watermark, or change my images in any way without written permission.

Republishing posts in their entirety is prohibited. If I somehow produce something that inspires you to create your own, please credit me and link back to my site. Thanks!
  • Blog
  • Home
  • Tutorials
  • About Me
  • Contact Me
  • 3D Projects
  • CGP VIP Group

Join us on Instagram

We’ve got some good ones! #citygirlplanners #pl We’ve got some good ones!

#citygirlplanners #plannercommunity #plannerrefills #plannerstuff
Just waiting on that UAP info to drop. 🤔😏 # Just waiting on that UAP info to drop. 🤔😏

#unicornsfromuranus #citygirlplanners #plannerlife #stationerylove
So, I did a thing. Working on a pain point for Per So, I did a thing. Working on a pain point for Personal size. This is for those of you who think it’s too narrow but don’t want to purchase a new PW binder. Franklin Covey Compact is the next best thing. 

If you have a FFC binder already, we now will have refills for you too! 

#franklincoveycompact #citygirlplanners #personalringplanner #lvmmagenda
Foil lovers... we heard you. Since our foil equi Foil lovers... we heard you. 

Since our foil equipment went down, the messages and emails have not stopped. We know how much you love the look and honestly we love it too.

Replacing commercial foil equipment runs into the tens of thousands of dollars and, like a lot of small businesses right now, that's just not realistic. 

After months of testing with our existing setup, we think we found a way to bring foil back.

It's not mass factory perfect. Occasionally there may be a tiny spot where the foil doesn't pull 100%. Nothing obvious, nothing we wouldn't personally use, and nothing that doesn't meet our standards will ship.

But overall? We think it looks pretty gorgeous.

Before we officially bring foil back…

Would you still want it knowing it's handcrafted and not machine perfect? 

Tell me honestly in the comments. Your feedback will decide this one. 

#foilinserts #foilingtechnique #citygirlplannersinserts #citygirlplanners
Now on to the cutting phase. #citygirlplanners # Now on to the cutting phase. 

#citygirlplanners #stationerylove #plannercommunity #behindthescenes
New notepads in the making. Any guesses? #citygir New notepads in the making. Any guesses?

#citygirlplanners #plannercommunity #plannerlove #citygirlplannersinserts
Nothing ruins a perfectly good month like… bills Nothing ruins a perfectly good month like… bills.

Good news: when everything’s written down, at least the chaos is organized.

Pay it. Check it off. Pretend you’re thriving.

#CityGirlPlanners #AdultingButMakeItCute #BillTracker #PlannerLife #OrganizedChaos
Personal Size planners get a bad rap for one reaso Personal Size planners get a bad rap for one reason…

They’re narrow.

And I get it.
Personal is the perfect middle ground. Bigger than Pocket, fits in your purse, but way more portable than A5.

But the width?
That’s always been the complaint.

Lately I’ve been seeing people try to squeeze Personal Wide into standard Personal binders… and then wonder why the pages stick out.

So instead of making it wider… I went the other direction.

Foldouts.

For 2026, I reworked the layout to give you more planning space without changing the footprint.

Month on one page
Straight into your weekly
Dashboard space (because you know I had to keep that)
And when it’s folded?
Standard Personal Size. Fits your binder like it should.

Now I need your opinion before I finalize this…

What works better in vertical boxes?

Graph (left side)
or
Lines (right side)

Tell me in the comments — Graph or Lines?
Who else misses Micro planners? I found this under Who else misses Micro planners? I found this under a stack of papers. Don’t know how long it’s been chillin under there but I’m going to start using it. Great for quick notes and things you need to dump but don’t need long term.
Follow Us!

Categories

Archives

Copyright © 2026 · HappyCardFactory Designs